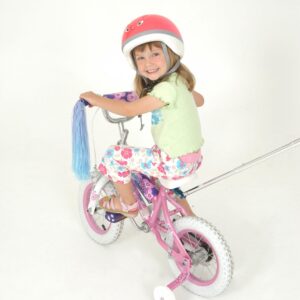
Installing a push handle on a child’s bike can greatly enhance safety and convenience during family bike rides. PushmeHome is a renowned Australian brand that specialises in high-quality push handles for children’s bikes. In this article, we will explore the best practices for installing a push handle, focusing on ensuring the safety and comfort of young riders. By following these guidelines, you can provide an enjoyable biking experience for your child while maintaining control and support when needed.
Choose the Right Push Handle
Before beginning the installation process, it is crucial to select the appropriate push handle for your child’s bike. PushmeHome offers a small but mighty range of fun and high-quality push handles designed specifically for children’s bikes. Consider the size, design, and materials of the handle, ensuring it is compatible with your child’s bike model and age. Look for handles that provide a comfortable grip and are made from durable materials to withstand outdoor wear and tear.
Gather the Necessary Tools
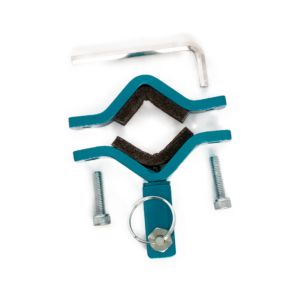
To ensure a smooth installation, gather the required tools before starting. These may include a screwdriver, adjustable wrench, Allen key (if needed), and possibly a drill for certain installations. Refer to the push handle’s installation instructions or consult with PushmeHome for any specific tools recommended for their products.
Prepare the Bike
Before installing the push handle, prepare the child’s bike. Ensure that the bike is parked on a stable surface, and the wheels are locked or secured to prevent any movement. Check the bike’s tires, brakes, and other components for any signs of damage or wear that may affect its performance during installation and use.
Install the Push Handle
Follow these step-by-step instructions to install the push handle on your child’s bike:
Step 1: Familiarise yourself with the instructions – Carefully read and understand the installation instructions provided by PushmeHome. Pay attention to any specific guidelines or requirements unique to their push handle.
Step 2: Position the handle – Determine the ideal position for the push handle on the bike. Typically, it is attached near the seat post or the rear of the bike frame. Ensure that the handle’s placement allows for a comfortable grip and doesn’t obstruct the child’s movement or any existing bike accessories.
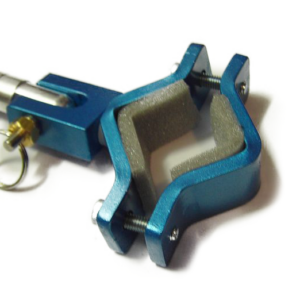
Step 3: Attach the handlebar clamp – If your push handle has a clamp mechanism, align it with the desired position on the bike’s frame. Use the appropriate tools to secure the clamp firmly, ensuring it doesn’t move during use.
Step 4: Attach the push handle – With the clamp securely in place, attach the push handle to it according to the manufacturer’s instructions. Typically, this involves aligning the handle with the clamp and tightening the screws or fasteners provided.
Step 5: Test the installation – Once the push handle is attached, give it a firm tug to ensure it is securely fastened to the bike. Verify that the handle provides a comfortable grip and remains stable during use.
Safety Considerations
When installing a push handle on a child’s bike, keep these safety considerations in mind:
a. Age-appropriate use: Ensure that the push handle is suitable for your child’s age and developmental stage. Follow the manufacturer’s guidelines regarding minimum and maximum weight limits for safe usage.
b. Proper supervision: Although the push handle provides support, it is crucial to supervise your child closely during bike rides. Maintain visual contact and guide them when necessary.
c. Helmet use: Always ensure your child wears a properly fitting helmet when riding the bike, regardless of whether the push handle is installed or not. Helmets are essential for protecting against head injuries.
Installing a push handle on your child’s bike from PushmeHome can significantly enhance safety and comfort during family bike rides. By following the best practices outlined in this article, you can ensure a secure and enjoyable biking experience for your child. Remember to choose the right push handle, gather the necessary tools, and carefully follow the installation instructions provided by PushmeHome. With these steps, you’ll be on your way to creating memorable moments while keeping your child safe and supported on their biking adventures.