

A lot of parents like to use training wheels when they are teaching their children to learn to ride a bicycle. Whilst training wheels can be a great aid for teaching children to ride a bike, they are by no means the only way to teach them how to ride. In this blog post, we will be exploring some other techniques for teaching your child to ride a bike.
Before we get into this though, let’s take a look at what training wheels are, and how they can help your child to learn to ride. Essentially, training wheels (also known as stabilisers) are an extra set of wheels that can be attached to the back of your child’s bike near the rear wheels.
The main benefit of these is that they provide some extra support, and help to keep your child balanced when they’re first learning to ride. They can be a big help for keeping your child balanced whilst they are working to master some of the other key skills needed for riding a bike – for example, moving their feet in the pedalling motion, and keeping their feet on the pedals whilst the bike is moving. They can then master the balancing aspect later, once they have accomplished these other key skills.
Although training wheels have some great benefits, they may not be right for every parent or every child. In fact, some parents prefer to teach their children to learn to ride without training wheels. If you’re one of them, the good news is that there are loads of ways that you can teach your child to learn to ride a bike – with no training wheels required.
Here are some of the ways that you can teach your child to ride a bike without training wheels:
- Balancing and pedalling are both equally as important when it comes to learning to ride a bike. However, if you are going to be teaching your child to learn to ride without training wheels, we would suggest that you get your child to focus on learning to balance first before moving onto other things like pedalling.
To teach your child to balance, start by getting them to sit on the seat, and walk their bike forward with their feet on the ground. This will help them to get used to balancing the bike, whilst also practicing things like steering. Some people like to remove the pedals from the bike for this step, though this is optional.
At first, you’ll want to get them to try doing this in straight lines. However, you should also give them the opportunity to try this out on slight slopes and turns.
- Once they’ve had a chance to practice walking the bike along, get them to experiment with the hand brakes. This will allow them to practice how to get the bike to stop and start moving.
- Once they’ve mastered balancing and braking, the next thing to do is to teach them how to pedal.
A lot of parents ask us what the best way is to teach their kids to pedal. There are a few techniques for this, though our favourite is the clock position technique. Essentially, this uses the face of a clock to explain different foot and pedal positions. This is a great way to help your child understand what they should be doing with their feet.
At the beginning, you will want to start with the pedal in an eleven o’clock position, which is a good starting position. Your child will need to put one foot on the pedal and push forward, then push down as the pedal reaches the one o’clock position.
At this point, the second pedal will come up on the other side. All they’ll need to do is repeat the process to keep the pedals moving.
Once they’ve got to grips with these basics, you can continue to use clock analogies to explain what to do with their feet as they continue pedalling. For example, you can explain that they need to point their foot to the ground as it reaches five o’clock, or keep light pressure on the pedal as it comes up from the seven o’clock mark. - Once your child has had a chance to practice both balancing and pedalling, let them have a go at doing both together. To start with, you may want to hold onto the bike to provide them with that added sense of safety and security. Alternatively, you could hold your child under the armpits.
Hold on, and let them try balancing the bike and pedalling at the same time. Once they are comfortable with this, it’s time to let go! See how your child goes with balancing and pedalling at the same time when you take your hands off the bike. You may want to stay close by, so that you can grab back onto the bike if it starts to overbalance or topple over.
As your child gains more practice with balancing and pedalling at the same time, you will usually find that their confidence grows quite quickly, and they’ll be riding on their own in no time!
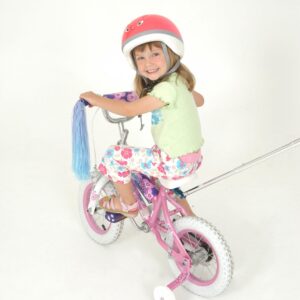
Remember, learning to ride without training wheels isn’t for everyone, and some children may prefer the extra support until they grow their confidence to ride without them. If you’d prefer to go the training wheels route, why not use a bike assistance handle as well for that extra confidence and support?
Bike assistance handles are a great way to reassure your little one as they grow their confidence on a bike, and support them until they are ready to ride on their own. Bike assistance handles also help to keep your child’s bike on course, and control the speed they are riding at. You can also give them a hand braking on steep downward hills, provide that extra push or muscle where needed, and do the hard work for them when they get too tired to ride home (a common scenario for any parent teaching their child to ride!)
Bike assistance handles are super easy to install, especially if you opt for a high-quality product like Push Me Home. Simply clip your bike assistance handle onto the back of your kids’ bike, and hold on! Please note that Push Me Home is only designed to be used when learning to ride with training wheels.
-
Product on sale
 PUSH ME HOME Assistance Push Handle For BikeOriginal price was: $65.98.$55.95Current price is: $55.95.
 -
Product on sale
 PUSH ME HOME Push Handle For TrikeOriginal price was: $65.98.$55.95Current price is: $55.95.
 -
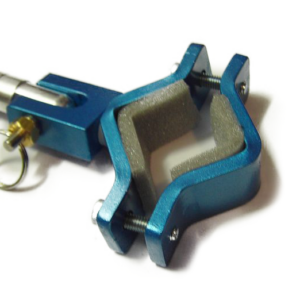
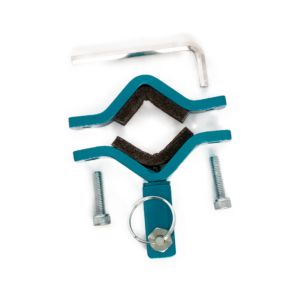 Clamp for Trike – Handle not included$28.00
 -
Product on sale
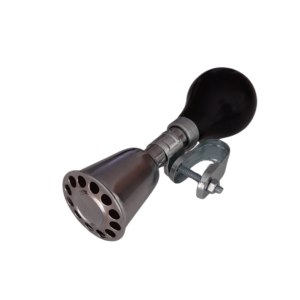 Classic Trumpeter Bike Horn to suit kid’s bicycleOriginal price was: $24.99.$19.99Current price is: $19.99.
Whether you are using training wheels or not, there are a few other important things that you will need to keep in mind when teaching your child to ride a bike. For one thing, you will want to pick a bike that is lightweight and the right height for your child. This will make the process of learning to ride easier, compared to your child learning on a bike that is too heavy or too big (which may be harder to control, and prone to overbalancing).
Ideally, a kids’ bike should be no more than 25-50% of their weight; any heavier than this, and the bike is likely to be too heavy for them. Also, a children’s bike should allow them to have their feet flat on the ground when they are sitting on the seat. If you find that their feet are off the ground when they are sitting in the saddle, the bike is likely to be too big for them.
Also, if your child is learning to ride, a proper bicycle helmet is a must. A helmet that is correctly sized, fitted, and fastened will create a protective barrier, and protect your child’s head and brain in the case of a fall. You can find out more about choosing a children’s bike helmet here.
Finally, you may also want to consider investing in some knee or elbow pads for your child. Whilst cuts and grazes are a normal part of learning to ride, elbow and knee pads can help to reduce injuries in the event of a crash or fall.
Training wheels or no training wheels, teaching your child to ride a bike should be an exciting milestone for everyone, so have fun with it! We have a range of other resources on our website to help you teach your child how to ride, and make the journey a fun one for everyone. You can find these here. In particular, you might find this blog post on Tips for Teaching Your Child to Ride a Bike useful.